

Signing in
1
Open VirtualBrain
Go to app.getvirtualbrain.com in any modern browser (Google Chrome recommended). There’s no firm-specific URL to track down.
2
Enter your professional email
Type your work email address and click Continue. VirtualBrain routes you to your firm’s sign-in method, whether that’s single sign-on with your Google or Microsoft work account or an email and password. Tick Remember me to stay signed in on that browser.If you don’t have access yet, contact your VirtualBrain administrator or email kata@getvirtualbrain.com.
3
Complete the welcome tour
The first time you sign in, a short onboarding introduces Brains, Chat, Apps, and the browser extension.
A tour of the interface
Every screen shares the same frame: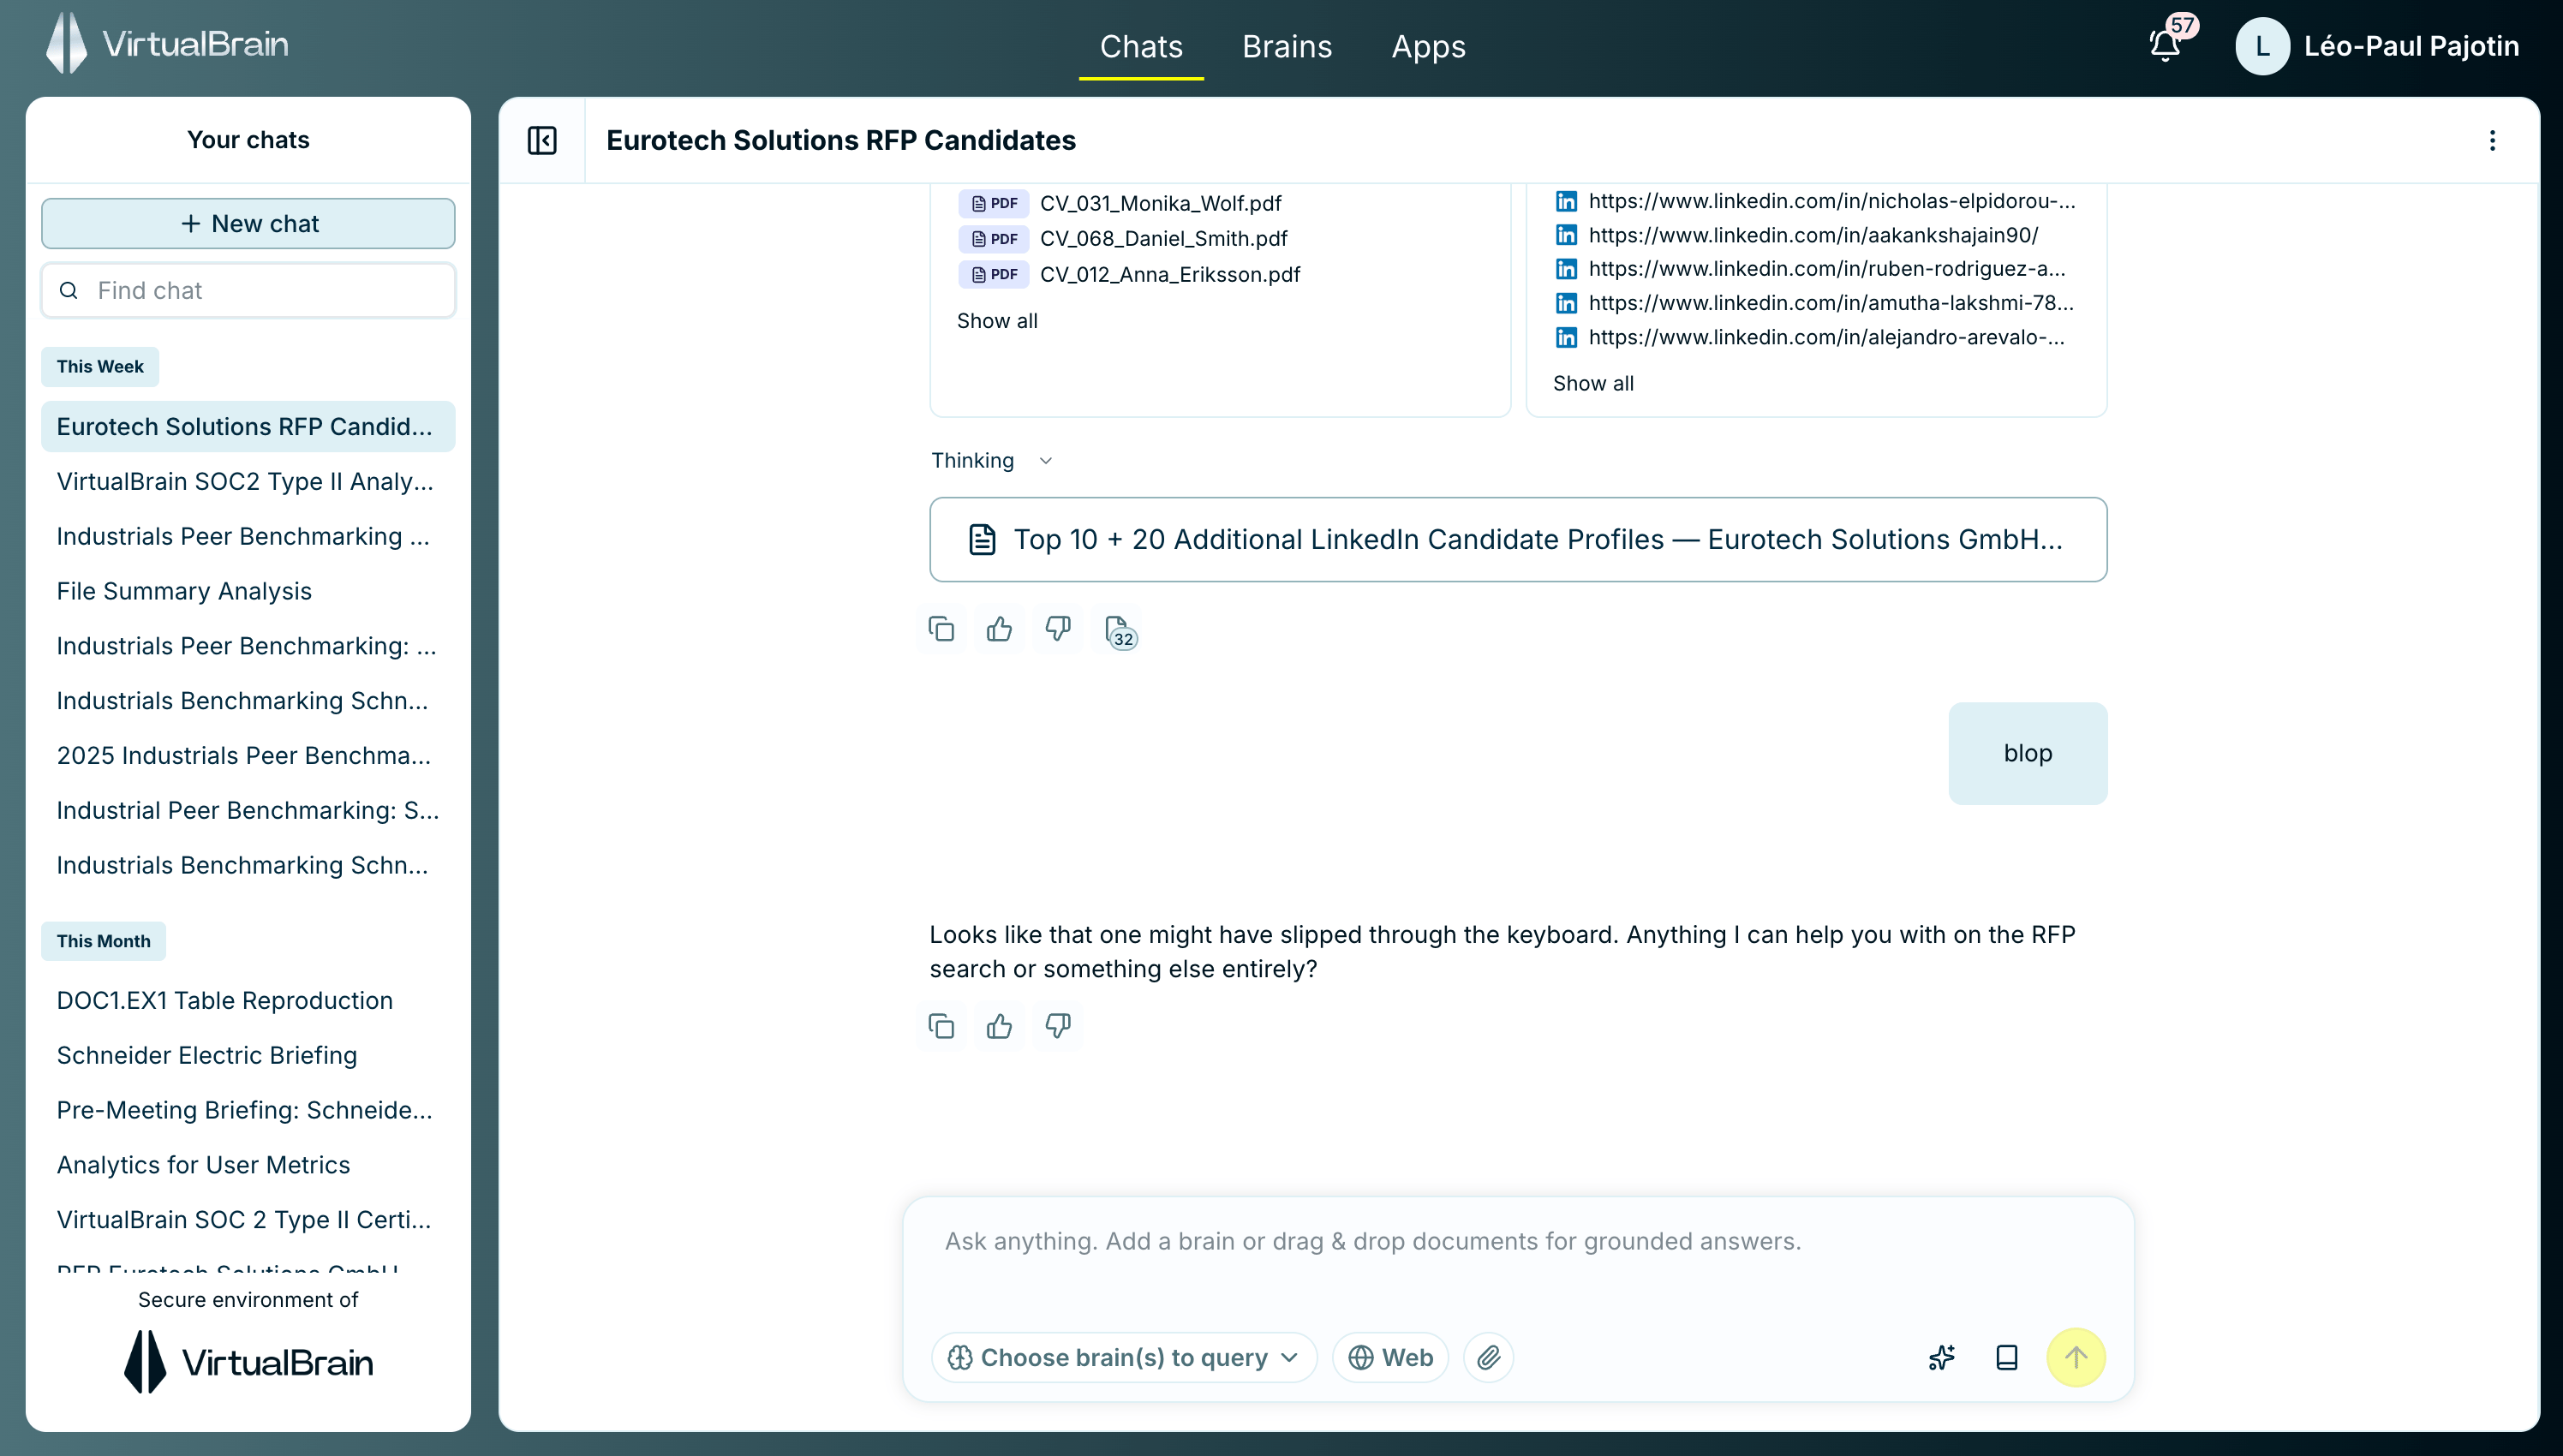
Top navigation (Chats · Brains · Apps), the contextual sidebar, and the chat input bar.
- Top navigation: The three main areas, Chats, Brains, and Apps, sit in the center of the top bar and are always one click away.
- Contextual sidebar: The left panel changes with the area you’re in: your chat history, your list of Brains, or your App sessions and library.
- Account & notifications: Top-right, the bell shows processing updates, and clicking your name opens the account menu.
The account menu
Clicking your name in the top-right opens the account menu: the Admin Dashboard (administrators only), Settings, Book an AI Expert, Support, and Log out. Settings opens its own panel, holding your profile, slide templates, and what VirtualBrain remembers about how you work. See Personalization for both the menu and the panel.Your first 5 minutes
Three steps take you from nothing to a sourced answer. The Quickstart walks through each one:- Create a Brain and add a document: Go to Brains, click New brain, name it after the engagement, then drag in a document or two.
- Ask your first question: Open Chats, choose your new Brain, and ask something specific.
- Run your first App: From Apps, pick a pre-built workflow such as a due-diligence summary and let it produce a finished draft.